Introduction
Virtualbox is an open source virtualization product that supports a wide variety of OS's. Among other things, it is supported on my OS of choice, FreeBSD, and allows me to run test environments with Windows 8 and other OS's. Recently, however, I ran into a dbus bug that doesn't allow me to choose the ISO image to boot from. Well, rather than just write up a quick article on how to mount an ISO without the GUI, I figured I would do the whole thing and create a VM from the command line. In this case, we will be creating a KALI linux system for pentration testing.
VBoxManage
We can use VBoxManage command to create and manage a virtual machine. If we execute the VBoxManage command alone, it will generate a very large amount of help, of which only the top part is shown here:
[tethys]:/home/rnejdl> VBoxManage
Oracle VM VirtualBox Command Line Management Interface Version 4.2.12_OSE
(C) 2005-2013 Oracle Corporation
All rights reserved.

Usage:

  VBoxManage []


General Options:

  [-v|--version]            print version number and exit
  [-q|--nologo]             suppress the logo
  [--settingspw ]       provide the settings password
  [--settingspwfile ] provide a file containing the settings password


Commands:

  list [--long|-l]          vms|runningvms|ostypes|hostdvds|hostfloppies|
                            bridgedifs|hostonlyifs|dhcpservers|hostinfo|
                            hostcpuids|hddbackends|hdds|dvds|floppies|
                            usbhost|usbfilters|systemproperties|extpacks|
                            groups

...
Create the Virtual Machine
The first step is to create the VM and in the case of Kali, it is closest to Debian in that it uses .deb packages so we'll go with that.
[tethys]:/home/rnejdl> VBoxManage createvm --name KaliLinux --ostype Debian --register
Virtual machine 'KaliLinux' is created and registered.
UUID: 5d00f26d-98dd-48b7-b2c8-213897960e4e
Settings file: '/home/rnejdl/VirtualBox VMs/KaliLinux/KaliLinux.vbox'
[tethys]:/home/rnejdl>
You can check your machine by running:
[tethys]:/home/rnejdl> VBoxManage showvminfo KaliLinux
Name:            KaliLinux
Groups:          /
Guest OS:        Debian
UUID:            5d00f26d-98dd-48b7-b2c8-213897960e4e
Config file:     /home/rnejdl/VirtualBox VMs/KaliLinux/KaliLinux.vbox
Snapshot folder: /home/rnejdl/VirtualBox VMs/KaliLinux/Snapshots
Log folder:      /home/rnejdl/VirtualBox VMs/KaliLinux/Logs
Hardware UUID:   5d00f26d-98dd-48b7-b2c8-213897960e4e
...
Set Memory
The default memory size is 128M and that is a bit too small. I prefer 1024M and we do that by doing the following:
[tethys]:/home/rnejdl> VBoxManage modifyvm KaliLinux --memory 1024
[tethys]:/home/rnejdl> VBoxManage showvminfo KaliLinux | grep "Memory size"
Memory size:     1024MB
[tethys]:/home/rnejdl>
Set NIC to Bridging Mode
Sure, you can totally skip this step depending on your configuration but in my case, the default doesn't work so well.
[tethys]:/home/rnejdl> VBoxManage modifyvm KaliLinux --bridgeadapter1 msk1
[tethys]:/home/rnejdl> VBoxManage modifyvm KaliLinux --nic1 bridged
[tethys]:/home/rnejdl> VBoxManage showvminfo KaliLinux | grep "NIC 1"
NIC 1:           MAC: 080027B95741, Attachment: Bridged Interface 'msk1', Cable connected: on, Trace: off (file: none), Type: 82540EM, Reported speed: 0 Mbps, Boot priority: 0, Promisc Policy: deny, Bandwidth group: none
[tethys]:/home/rnejdl>
Create the Hard Drive and Attach It
This command will create the drive whereever you are located so I put in the relative path to keep things clean and organized.
[tethys]:/home/rnejdl> VBoxManage createhd --filename VirtualBox\ VMs/KaliLinux/KaliLinux.vdi --size 18000 --format VDI
0%...10%...20%...30%...40%...50%...60%...70%...80%...90%...100%
Disk image created. UUID: cbaf6757-94cf-4385-bac9-8281dc1adbb0
[tethys]:/home/rnejdl> VBoxManage storagectl KaliLinux --name "SATA Controller" --add sata --controller IntelAhci
[tethys]:/home/rnejdl> VBoxManage storageattach KaliLinux --storagectl "SATA Controller" --port 0 --device 0 --type hdd --medium VirtualBox\ VMs/KaliLinux/KaliLinux.vdi
[tethys]:/home/rnejdl>
Mount CD-ROM
We need to mount a cd/dvd rom to our virtual machine in order to start the OS installation. I've already downloaded the ISO file so I am mounting it here.
[tethys]:/home/rnejdl> VBoxManage storagectl KaliLinux --name "IDE Controller" --add ide --controller PIIX4
[tethys]:/home/rnejdl> VBoxManage storageattach KaliLinux --storagectl "IDE Controller" --port 1 --device 0 --type dvddrive --medium Desktop/kali-linux-1.0.1-i386.iso
[tethys]:/home/rnejdl>
You can check your work by running:
[tethys]:/home/rnejdl> VBoxManage showvminfo KaliLinux
Name:            KaliLinux
Groups:          /
Guest OS:        Debian
UUID:            5d00f26d-98dd-48b7-b2c8-213897960e4e
Config file:     /home/rnejdl/VirtualBox VMs/KaliLinux/KaliLinux.vbox
Snapshot folder: /home/rnejdl/VirtualBox VMs/KaliLinux/Snapshots
Log folder:      /home/rnejdl/VirtualBox VMs/KaliLinux/Logs
Hardware UUID:   5d00f26d-98dd-48b7-b2c8-213897960e4e
Memory size:     1024MB
...
Start the VM
At this point, you can either start the VM from the GUI or you can start it up using VRDE.
[tethys]:/home/rnejdl> VBoxManage modifyvm KaliLinux --vrde on
[tethys]:/home/rnejdl> VBoxManage modifyvm KaliLinux --vrdemulticon on --vrdeport 3390
[tethys]:/home/rnejdl> VBoxHeadless --startvm KaliLinux
Oracle VM VirtualBox Headless Interface 4.2.12_OSE
(C) 2008-2013 Oracle Corporation
All rights reserved.
Connect to It
You can remote desktop now to that machine if you know the IP of it.
[tethys]:/home/rnejdl> rdesktop 192.168.254.101:3390
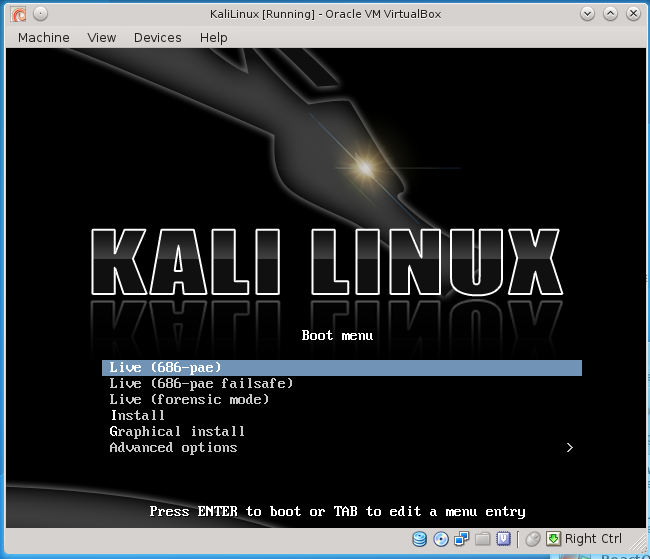
In my case, I started it up using the GUI and was greeted with:
