Upgrading FreeBSD
I have upgraded FreeBSD boxes in 3 different ways. I will detail these methods below and give you the pro's and con's of each.
Reinstall
Well, with any computer, you always have the option of reinstalling your OS. However, this seems so Windows and that's the big rub. To do this method, simply backup all of your important files to another host. The issue here is to make sure that you don't miss any files and that you are aware of the permissions as they should be.
Next, go ftp.FreeBSD.org/pub/FreeBSD/tools/ and obtain a copy of the latest kern.flp and mfsroot.flp. Use fdimage if you are on windows to create the disks or dd if=kern.flp of=/dev/fd0 if you are using unix.
Then, go ahead and reinstall your system. The advantage of this is if you made a mess out of your libs or file system, then this will clean it up. You also get the most current & stable builds of the software you install. However, it takes a while and is prone to mistakes, such as missing a file. For example, I forgot to copy my /etc/namedb directory one time so I had to reconstruct all of my zone files from nslookups.
Sysinstall
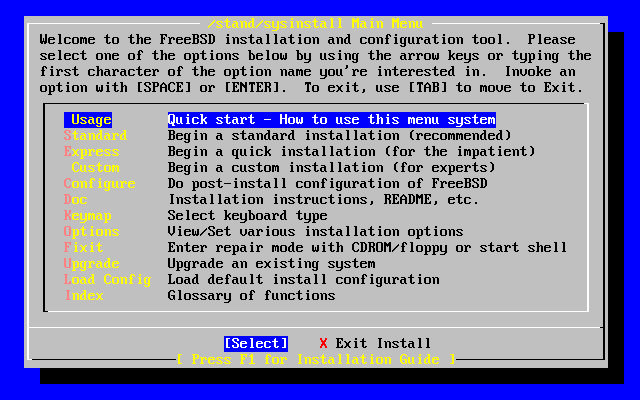
Another option that's available is to setup the book disks as listed above and then to boot from them. Below is the main sysinstall screen:

From here, you can choose Upgrade. The software will give you a lot of warnings and with some justification. I have used this method one time now and for the most part, it worked with the exception of one major problem. All of my ports are no longer compatible with the installation and will not work. So, although this method was easier than the first method, it really did not work so well.
Make World
So, yesterday, I realized that I needed to make a change to my kernel and so I made my changes to it and then went to run /usr/sbin/config on it and the system told me that my version of config did not match my source tree. This is correct. For some time now I have been running CVS to keep both my ports and source trees current. The only problem is, I had no idea what to do with it once I had things current.
With the sources, you can perform something called a Makeworld as follows to upgrade your entire operating system.
- Reboot your computer to single user mode.
- Run an fsck -y
- Run mount -u
- Run mount -a
- Load your swap partition by typing swapon -a
- Now, go to your /usr/src directory and run a make buildworld to compile all of your sources. This does not actually install anything. If you want to run this as multi-threaded as FreeBSD recommends, then run this command instead make -j4 buildworld
- After several hours of compiling, you can then install the sources by running make installworld
- Now, you need to rebuild your kernel using the new sources. Run a make buildkernel from the /usr/src directory. This will be the GENERIC kernel.
- To install your new kernel, run make installkernel
- Run mergemaster to clean up all of the files in the /etc/ directory. This is an automated manual process, so be prepared to do a lot of confirming of changes.
- Go to the /dev/ directory and rebuild all of your devices by running sh MAKEDEV all
- To rebuild sysinstall go to /usr/src/release/sysinstall and run make all install. (If you ever need to upgrade a small part of your source, you can use this same process here just going to the appropriate directory.)
- Run fastboot to reboot.
- After booting, you should come up with your new GENERIC kernel and by running a uname -a, you should see the new version of your OS is installed.
[tethys]:[12:07pm]:[/home/rnejdl] > uname -a
FreeBSD tethys.ringofsaturn.com 4.5-STABLE FreeBSD 4.5-STABLE #0: Sat Feb 16 23:15:16 CST 2002     root@tethys.ringofsaturn.com:/usr/src/sys/compile/SATURN  i386
[tethys]:[12:07pm]:[/home/rnejdl] >
- At this point, you can delete the /usr/obj directory to clean up some space and you will have to do this anyways if you want to upgrade your sources again.
- To rebuild your kernel, you can follow the normal process. However, I had to delete all of the /usr/src/sys/compile/KERNELNAME directory before my kernel would compile correctly, so you should probably delete this before rebuilding your new kernel.
That may look like quite a few steps but this is a pretty straight forward process but the process is fairly forgiving. I screwed up several steps here because I didn't read the directions and I still was able to successfully complete the entire process.